Friday, November 22, 2013

Being a successful mobile developer - Windows Phone, Marketing & Xamarin

,

Why Windows Phone?

This is not a new question, but a question or topic that I get involved a lot.  Why do you have a Windows Phone? Why do you build apps for that platform? You should be learning Java and Objective C and putting your apps on iOS and Android; that's where the users are.

That is the message from the media, family, tech pundits and co-workers. And the numbers say that as well; the latest report shows that Android holds a ridiculous global market share of 80%, Apple with 12% and Windows Phone at 4% respectively.  So why should I build an app for Windows Phone first?

Its about visibility.

Visibility

Apple has more than 1 million apps on the iOS platform and Android just over 800,000. It is virtually impossible without spending an enormous amount of time, money and or energy getting an app exposure to the user base.  However, through programs like Nokia's DVLUP you can manage to get very visibility in the marketplace, increased reviews and downloads and through the combination of all of these. Revenue will begin to climb. Now, there is some learning to be done by the developer when it comes to monetizing your app; I won't go into the various strategies as there have been many workshops/articles/blogs published so definitely look into those.

Building a Brand / Marketing

Build it and they will come is not a marketing campaign strategy! I'm pretty involved in the community and talk with a lot of developers, read quite a few email and message board threads about how they have a new app for this or that...please review, download etc.  But that is the last place I see it ever mentioned.

Here are a few suggestions:

  • Build a Facebook Fan Page - it's free
  • Azure Websites - every subscriber gets 10 free site, build one for your app
  • Blog about the technology you used in your app, why you chose to do it. 
  • Contact Media outlets about your app - wpcentral.com, wmpoweruser.com
  • Use social media to your advantage - twitter, Facebook, LinkedIn, Google+, Instagram (yes) & learn what a hashtag (#) is and use those to your advantage. If you don't know ask a teenager.

Design

Now none of the above will matter if your app is a battleship grey page with black comic sans font. Spend some time on design.  Now I know, not all developers are good designers. Guess what? Not all designers are good developers.  Find a friend who knows Photoshop, team up! There is this really cool online collaboration tool - Team Foundation Service that's free for up to 5 users, collaborate on a project and make it happen.

Build with Other Platforms in Mind - Xamarin

Now that you have a great idea, either put together a great design or found a friend & have a marketing strategy.  Build your app with the correct tools and architecture so when you have Android and iOS users wanting it, you can respond in a reasonable amount of time.

Xamarin and Microsoft have teamed up to bring a closer integration in Visual Studio 2013 to allow you to create native iOS and Android applications (not HTML5 & JavaScript) using C# and Portable Class Libraries. Thus maximizing your code reuse.

Microsoft also just announce full Azure Mobile Services support for Xamarin.

I will be blogging more examples, in the meantime visit www.xamarin.com and follow @xamarinhq & @jamesmontemagno (Xamarin Developer Evangelist) on twitter.

Please feel free to contact me via twitter @spboyer concerning xamarin, portable class libraries, windows phone development, windows 8 development or anything.
Read more →

Friday, November 15, 2013

Presenting Azure Mobile Services @ DVLUP Day Tampa 11/16/2013

,
Nokia, through its DVLUP program, is putting on DVLUP day in various cities from Nov. 16 - Dec 6.  I'll be in Tampa on the 16th of November presenting Azure Mobile Services.

I'll give an overview of:

  • Getting Started
  • Push Notifications
  • Visual Studio 2013 Tools for Azure
  • General Q & A


I will also be around all day if you have any questions about Portable Class Libraries or Advanced features of Azure Mobile Services such as complex data types, authentication, etc.

Event Summary

Spend a day with two of our top Nokia Developer Ambassadors, Bill Reiss (@billreiss) and Atley Hunter (@atleyhunter). Together, Bill and Atley will guide you through the process of publishing your apps to the Windows Phone Store - either from scratch, or porting from iOS or Android.

Whether you’re a first-time developer, or a seasoned pro who wants to know more about Windows Phone, this event is for you.

If you are in the Tampa Area, there is still space so sign up! There are other dates and locations available and they can be found on the DVLUP site (http://www.dvlup.com/Events/138).

You will need to have your DVLUP account ID. If you haven’t signed up already, sign up today at  www.dvlup.com

 To win a device you need to complete one of these DVLUP challenges:

http://www.dvlup.com/Challenge/32

http://www.dvlup.com/Challenge/125

Your app must be published within 14 days of your event to win.

If you are attending, be sure to tweet and use the hashtag #DVLUPday #tampa and follow @dvlup

Read more →

Saturday, August 24, 2013

Azure Mobile Services & Portable Class Libraries - Part 2 Authentication Cont'd

,
In Part 1 I covered a simple implementation of the Authentication feature and portable class libraries from the Azure Mobile Services SDK.  However, as mentioned in the "Good & Bad So Far" section; there is not a whole lot of code reuse other than the Azure endpoint and secret key.  Let's refactor a bit by adding some interfaces, conditional compile statements and the MVVM Light Event Bus to help the same solution operate cleaner.

The "after" code for part one is available here.

Building Our Core

PortableAzure.Core is our Portable Class Library that is being shared with the Windows 8 and  Windows Phone project in the attempt to reuse as much code as possible.  However, as mentioned in Part 1 the authentication portion of the Azure Mobile Service SDK is a platform specific implementation due to the UX pieces of that component and how it is presented varies.

Platform Adapter (PlatformAdapter.cs)

In the Services folder, add a new class called PlatformAdapter.cs.  This is an abstract class that will be used as the base class for the platform specific implementation.

    public abstract class PlatformAdapter
    {
        public static PlatformAdapter Current { get; set; }
        public abstract IIdentity Identity { get; }
    }

Identity (IIdentity.cs)

Add a new Identity interface, IIdentity.cs to be used as the implementation to execute the Authenticate method as well as store the MobileServiceUser upon logging in.

    public interface IIdentity
    {
        void Authenticate();
        MobileServiceUser User { get; set; }
    }


 Messages

Add a Messages folder to the root and a class called LoginMessage.cs to newly created folder.

Using the Event Bus from MVVM Light, a LoginMessage will be sent from the platform specific MainPage.xaml then subsequently handled in the MainViewModel.  The LoginMessage is just an empty class at this point.

    namespace PortableAzure.Core.Messages {
        public class LoginMessage { } 
    }

Adding Adapters to the Platforms

On each plaftform we need to now inherit from the PlatformAdapter.cs class in the Services namespace from the Core library as well as implement the IIdentity interface thus replacing the code shown in part one with this code.

Windows Phone

Add an "Adapters" folder to the root of the project and then a Platform.cs class which inherits from PlatformAdapter.

namespace PortableAzure.Phone8.Adapters
{
    public class Platform : PlatformAdapter
    {
        public IIdentity _identity = new Identity();

        public override IIdentity Identity
        {
            get
            {
                return _identity;
            }
        }
    }
}


Next, add the Identity class which is where all of the heavy lifting is done for the login logic.

namespace PortableAzure.Phone8.Adapters
{
    public class Identity : IIdentity
    {
        public async void Authenticate()
        {
            var app = ((App)Application.Current);

            string message = string.Empty;

            while (this.User == null)
            {
                try
                {
                    User = await app.Azure.MobileService.LoginAsync(MobileServiceAuthenticationProvider.Twitter);

                    message = string.Format("You are now logged in - {0}", User.UserId);
                }

                catch (InvalidOperationException)
                {
                    message = "You must log in. Login Required";
                }
            }

            MessageBox.Show(message);
        }

        public MobileServiceUser User { get; set; }
    }
}   


Now that the Windows Phone implementation is complete we need to tell the Service library what is the current class is for the PlaformAdapater.  This is set in the App.xaml.cs class in the App contstructor:

public App()
{
   Azure = new AzureMobileServices();

   PortableAzure.Core.Services.PlatformAdapter.Current = new Platform();

   ...

Windows 8

To implement the PlatformAdapter class in the Windows 8 application, you could follow the same steps as documented for the Phone project, but that is duplication and not manageable over time.

So in this case we will use add the existing Identity and Platform classes then add conditional compile statements to the areas of the classes where needed to address the small differences for Windows versus Phone.

Add Existing item by holding the Alt key and dragging the file, or the whole folder from the Phone project to the Windows 8 Project.  Thanks Matt Hidinger for this little trick. You could also just go through the right click -> add existing -> add as link process but now that you know the "Hold Alt + Drag" why??

Here are the completed Platform and Identity classes.  You will need to repeat the setting of the current platform in the App.xaml.cs constructor.

Platform.cs


#if NETFX_CORE

namespace PortableAzure.Win8.Adapters

#endif


#if WINDOWS_PHONE

namespace PortableAzure.Phone8.Adapters

#endif

{
    public class Platform : PlatformAdapter
    {
        public IIdentity _identity = new Identity();

        public override IIdentity Identity
        {
            get
            {
                return _identity;
            }
        }
    }
}

Identity.cs

#if NETFX_CORE

namespace PortableAzure.Win8.Adapters

#endif


#if WINDOWS_PHONE

namespace PortableAzure.Phone8.Adapters

#endif

{
    public class Identity : IIdentity
    {
        public async void Authenticate()
        {

#if WINDOWS_PHONE

            var app = ((App)Application.Current);

#endif


#if NETFX_CORE

            var app = ((PortableAzure.Win8.App)(Windows.UI.Xaml.Application.Current));

#endif

            string message = string.Empty;

            while (this.User == null)
            {
                try
                {
                    User = await app.Azure.MobileService.LoginAsync(MobileServiceAuthenticationProvider.Twitter);

                    message = string.Format("You are now logged in - {0}", User.UserId);

                }

                catch (InvalidOperationException)
                {
                    message = "You must log in. Login Required";
                }
            }

#if WINDOWS_PHONE

            MessageBox.Show(message);

#endif

#if NETFX_CORE

            var messageDialog = new Windows.UI.Popups.MessageDialog(message);

            await messageDialog.ShowAsync();

#endif

        }

        public MobileServiceUser User { get; set; }

    }

}

Note, be sure to use the full namespace OR add more #if at the top for the imports.

Cleanup & Consolidation

Now that there is a single place where the application executes the call to Authenticate, through the magic of #if and reusing existing files, time to delete some code.  Nice right?

In Part, each of the front end projects had code in the MainPage.xaml.cs file within the "Loaded" handler to execute the Azure authentication code.  That can be replaced by using the Event Messaging Bus provided by MVVM Light and sending the LoginMessage.

Messenger.Default.Send<LoginMessage>(new LoginMessage());

In the MainViewModel, add the handler in the constructor and the Login subroutine to call the Authenticate method in the Identity interface.

 public MainViewModel()
 {
     Messenger.Default.Register<LoginMessage>(this, m => { Login(); });
  }

 public void Login()
 {
     if (PlatformAdapter.Current.Identity.User == null)
     {
         try
         {
           PlatformAdapter.Current.Identity.Authenticate();
         }
          catch (Exception ex)
         {
             Debug.WriteLine(ex.ToString());
         }
     }
 }

Now when either platform is run, the Login entry point happens in the MainViewModel upon loading of the main page.  Another option, if you wanted to eliminate the messaging, would be to add a login button and have the ICommand call the Login method thus eliminating any code behind in the MainPage.xaml but that depends on your applications needs.

Windows Phone
Windows 8 / RT


Wrapping Up Authentication

One item to mention, in this example every time the app is run on either platform the user will have to authenticate.  When the MobileServiceUser is successfully authenticated, there are two properties that you can save; MobileServiceAuthenticationToken and UserId respectively.  In a subsequent execution of the app, create a new instance of the MobileServiceUser and set the CurrentUser property of the AzureMobileService.MobileService. For Example:

var user = new MobileServiceUser(mySavedUserId);

user.MobileServiceAuthenticationToken = mySavedMobileServiceAuthenticationToken;

App.MobileService.CurrentUser = user;

Part 1 and Part 2 has shown a simple introduction of how to use portable class libraries with Azure Mobile Services and through the use of a little indirection reuse all the code possible BUT also keep the MVVM implementation and code organization as clean as possible.

Final Code for Part 2 located here

Read more →

Monday, August 5, 2013

Azure Mobile Services & Portable Class Libraries - Part 1 Authentication

,
Azure Mobile Services is undoubtedly one of the best platforms to emerge from the Azure group over the last year. If you are a mobile developer and not taking advantage of it; I encourage you to do so.  There are many video and blog posts available to get you started at http://www.windowsazure.com/en-us/develop/mobile/ .

One of the features you may not be aware of is Azure Mobile Services is a Portable Class Library (PCL) available through nuget. If you are not familiar with PCL's see my "Move Your ViewModels" series.

There is a caveat however when using Azure Mobile Services in your PCL; although all of the data calls to the services are available, using the Identity feature is not and must be implemented in a platform specific way.

The Identity feature allows your application to leverage the user's Microsoft, Google, Facebook or Twitter account to login to the application and abstract the overhead of OAuth or provider specific authentication models into a single call.

var user = MobileService.LoginAsync(MobileServiceAuthenticationProvider.Twitter);

The Challenge - Maximize Code Reuse

There is no secret that Model-View-View-Model (MVVM) is a preferred pattern for xaml developers, but it is also know that sometimes breaking patterns is needed either due to time constraints or other restrictions.

In the effort to maintain the MVVM pattern in this scenario a platform abstraction is needed to accomplish to goal of reusing as much code as possible.  Matt Hidinger did a great talk at BUILD 2013 this year on this topic, give a watch on his blog.

Scenario - Setting up your solution

I won't walk through setting up a Mobile Service on Azure, see this post for instructions, so let's assume we have a Windows Phone & Windows Store application where we'd like to share code in a Portable Class Library and allow the user to login with their Twitter account. The project solution should contain 3 projects:


  • PortableAzure.Win8 - Windows 8 Blank  Application
  • PortableAzure.Phone8 - Windows Phone 8 Application
  • PortableAzure.Core - Portable Class Library Project
    •  .NET Framework 4.0 & higher
    • Windows Phone 7.5 & higher
    • Windows Store Apps

I have added the following nuget packages to the projects

  • Microsoft.Net.Http
  • Portable.MvvmLightLibs
  • WindowsAzure.MobileServices

There is some plumbing related to the MVVM structure that is needed as well.  Get the "before" code here http://sdrv.ms/14ufYYZ , your solution explorer should look like the image here ->.


Adding Azure 


Assumption(s) - you have created a Azure Mobile Service.

First, you will want to add a new class to the Services folder in the PortableAzure.Core project and call it AzureMobileServices. I have also added an empty interface out of habit and to use for IoC (Inversion of Control).

namespace PortableAzure.Core.Services
{
    public class AzureMobileServices : IAzureMobileServices
    {
        public MobileServiceClient MobileService = new MobileServiceClient(
            "https://portableazure.azure-mobile.net/",
            "[your app key]"
        );
        public AzureMobileServices()
        {
        }
    }
    public interface IAzureMobileServices
    {
    }
}


The app key and url comes from the Azure portal when you complete the setup; you will want to choose "Connect to an Existing Project". Either Windows Phone or Windows 8 is an acceptable choice.

Next step is to setup the Twitter authentication, or other provider of your choosing.  (reference)

Now that that is complete, we'll add the necessary platform specific code to the Windows Phone & Windows 8 platforms to prompt the user to login using their Twitter account.

Windows Phone

Open the App.xaml.cs and create a new property for the AzureMobileService class from the Core project.

    public partial class App : Application
    {
        /// <summary>
        /// Provides easy access to the root frame of the Phone Application.
        /// </summary>
        /// <returns>The root frame of the Phone Application.</returns>
        public static PhoneApplicationFrame RootFrame { get; private set; } 
        public AzureMobileServices Azure { get; private set; } 
        /// <summary>
        /// Constructor for the Application object.
        /// </summary>
        public App()

Then in the App constructor create the new instance of the AzureMobileService class.

Azure = new AzureMobileServices();
 In order to prompt the user, open the MainPage.xaml.cs file and add the following code to the PhoneApplicationPage_Loaded event.

 private async void PhoneApplicationPage_Loaded(object sender, RoutedEventArgs e)
        {
            MobileServiceUser user = null;
            while (user == null)
            {
                string message;
                try
                {
                    user = await((App)Application.Current).Azure.MobileService.LoginAsync(MobileServiceAuthenticationProvider.Twitter);
                    message = string.Format("You are now logged in - {0}", user.UserId);
                }
                catch (InvalidOperationException)
                {
                    message = "You must log in. Login Required";
                }
                MessageBox.Show(message);
            }
        }


Windows 8

The implementation is essentially the same for Windows 8 with the exception of how to show a message box.

private async void Page_Loaded(object sender, RoutedEventArgs e)
        {
            MobileServiceUser user = null;
            while (user == null)
            {
                string message;
                try
                {
                    user = await((App)Application.Current).Azure.MobileService.LoginAsync(MobileServiceAuthenticationProvider.Twitter);
                    message = string.Format("You are now logged in - {0}", user.UserId);
                }
                catch (InvalidOperationException)
                {
                    message = "You must log in. Login Required";
                }
                var dialog = new MessageDialog(message);
                dialog.Commands.Add(new UICommand("OK"));
                await dialog.ShowAsync();

            }
        }

The Good & Bad - so far

To this point everything is working great and we have now effectively added the authentication to each platform using the Identity features in Azure Mobile Services. But other than the url and the key of the Azure Mobile Service; there isn't a lot of code reuse in this scenario.

This is a necessity when there are platform specific implementations of a feature.  In this case, the UI needs to present differently and cannot re-use the xaml or controls that are a part of the login utility for the specified provider.

The bad part of this is it breaks the MVVM pattern to a degree by putting some of the logic in the code behind.

In the next installment, I'll show how to add an abstraction layer and use the MVVM Light Event Bus to push some of this code back to our view models.

Here is the completed code for Part 1.


Read more →

Thursday, March 28, 2013

Cross Mobile Development with Icenium

,
I have recently spent some time with Telerik's new product offering for cross mobile development called Icenium and I have to say it is quite nice.  Paired with KendoUI Mobile you can't go wrong with a great set of tools for cross mobile platform development if you are an HTML + CSS + JavaScript developer.

Icenium

Icenium is a cloud based IDE, there is also a Windows WPF Click-Once app, that allows you as a developer to leverage your existing HTML, CSS and JavaScript skills to develop hybrid cross mobile platform applications.  Assistance of publishing your applications to the Google Play and Apple Store, integrated debugging and development environment, source control integration (including Git) and much more.  See http://www.icenium.com for more information.

I will mention also that the underlying bits of Icenium is PhoneGap (Apache-Cordova) which provides and API through JavaScript (cordova.js) to the device functions such as the camera other hardware capabilities.  For more information on that piece, Jim Cowart (@ifandelse) recently did a blog entry on their blog - "Demystifying Cordova and PhoneGap".

Getting Started

Head over to Icenium.com and click the "Get Started" button. Choose either the browser (cloud) based IDE or download the Windows app.


Once the application is launched select New Project -> Cross Platform Device Application (Kendo UI Mobile). Name the project "MyBloodPressure" and click Ok.

In doing so, Icenium presents the built in "Hello World" type template. Shows how geolocation, transitions, styling using Kendo UI Mobile etc.  If you run the application by either hitting F5 or clicking the "Run" icon atop the IDE you'll also see the awesome tools for viewing the various mobile devices currently supported as well.

After you spend a few minutes playing with the emulators and realizing how cool that all is, we'll rip out some stuff add some sauce to this and get cooking.

Reorganizing the Project for Organization

I'm a very big proponent of being able to look at a project and know what the heck is going without having to hunt down someone or run the code and step through it to find out how it's all composed.  

In a C#/XAML world in I use the MVVM pattern with MVVM Light for my projects. I like to see the view folder, viewmodel folder etc. when developing the app.  For doing so here I will leverage RequireJS  for structuring the organization.  

Removing unnecessary files

Delete the hello-world.js from the scripts folder as we will not be using this for the project.

Folder structure

First, lets create a few folders.  At the root of the project create an app folder that contains view, viewmodel and model.

For any scripts that are 3rd party libraries, I prefer to put those in the scripts folder and any that are related directly to the application specific functionality I organize them within the app folder appropriately.  Given that, I'll move the kendo.mobile.min.js, jquery.min.js and also add require.js to the scripts folder

Next, add a new JavaScript file to the app folder by right clicking and selecting add new file. Name is main.js; this will be the entry point to the application.

Also add a JavaScript file to the app folder named app.js, this will serve as the singelton for exposing the viewmodels and could also be referred to as the view model locator.

First item of business is to tell require.js where to find the modules we either have or will be creating in our application. Add the following to main.js to configure require.js.

require.config({
    paths: {
        jQuery: "../scripts/jquery.min",
        kendo: "../scripts/kendo.mobile.min",
        view: "../app/view",
        viewmodel: "../app/viewmodel",
        app: "../app"
    },
    shim: {
        jQuery: {
            exports: "jQuery"
        },
        kendo: {
            deps: ["jQuery"],
            exports: "kendo"
        }
    }
});

What this is doing, if you are not familiar, is telling require.js that when a module is defined like

define(['viewmodel/bp'], function(bp) { ... } );

it knows to go look for bp.js inside of the "[root]/app/viewmodel" folder and not a relative path etc.  In the shim portion of the code we are stating that kendo has a dependency on jQuery and should wait for that library to load first.  For more information on requirejs and the config method see http://requirejs.org/docs/api.html#config .

Finally in the main.js file add the following to create the app module, put it in scope and init the application.

var app;
require(["app/app"], function (application) {
    console.log('initializing');
    app = application;
    app.init();
});

Last order of business is to add the code to app.js to tell kendo to initialize the mobile application.  Here is the full app.js code for now.

define(["jQuery", "kendo"], function ($, kendo) {
    var _kendoApplication;
    return {
        init: function () {
            console.log('app init');
            _kendoApplication = new kendo.mobile.Application(document.body,
                    { transition: "slide", layout: "mobile-tabstrip" });
        }
    }
});   

The init function is called when the application first fires up setting the transitons of the app the 'slide' and telling kendo what the layout root of the app is; in this case 'mobile-tabstrip'.

Wiring Up Index.html

Now that the scripts, view, viewmodel, entry points etc. are all setup; open index.html.

In the <head> tag remove everything except the references to the .css and cordova.js files and the we need to add the script reference to main and require.js for our entry point.  After that all scripts will be loaded using AMD and require.js . 

    <head>
        <title></title>
        <meta charset="utf-8" />
        <script src="cordova.js"></script>
        <script data-main="app/main" src="scripts/require.js"></script>
        <link href="kendo/styles/kendo.mobile.all.min.css" rel="stylesheet" />
        <link href="styles/main.css" rel="stylesheet" />
    </head>

Also remove the script tag at the bottom of the file that refers to the kendo.mobile.application as we have now moved that to the app.js init function.

Finally, remove all <div> tag sections with a data-role of view other that the first one.  These will be separated into individual html files and stored in the views folder in Part 2 of the series.  The final html document should appear as:

<!DOCTYPE html>
<html>
    <head>
        <title></title>
        <meta charset="utf-8" />
        <script src="cordova.js"></script>
        <script data-main="app/main" src="scripts/require.js"></script>
        <link href="kendo/styles/kendo.mobile.all.min.css" rel="stylesheet" />
        <link href="styles/main.css" rel="stylesheet" />
    </head>
    <body>
        <div data-role="view" id="tabstrip-home" data-title="Hello World!">
            <h1>Welcome!</h1>
            <p>
                Icenium&trade; enables you to build cross-platform device applications regardless of your
                development platform by combining the convenience of a local development toolset with the
                power and flexibility of the cloud.
            </p>
        </div>
     
        <div data-role="layout" data-id="mobile-tabstrip">
            <header data-role="header">
                <div data-role="navbar">
                    <span data-role="view-title"></span>
                </div>
            </header>
            <div data-role="footer">
                <div data-role="tabstrip">
                    <a href="#tabstrip-home" data-icon="home">Home</a>
                    <a href="#tabstrip-uiinteraction" data-icon="share">UI Interaction</a>
                    <a href="#tabstrip-geolocation" data-icon="globe">Geolocation</a>
                </div>
            </div>
        </div>
     
    </body>
</html>

Conclusion

If you run the application you can see that the application still operates as it did in the very beginning, with the exception of the additional views not appearing, but the advantage here is that the overall structure allows for manageability moving forward as complexity is added to the project through data services and additional views. 

If there is something that you would like to see in a series or have a question please add a comment. 


Read more →

Monday, March 25, 2013

Custom Routing with IRouteConstraint for ASP.NET Web API

,
I will admit that Regex and I do not speak anymore.  In fact, even when we did it was never a really nice conversation and sometimes ended in me cursing and/or leaving the room.

If you have had this same experience when creating custom routes in ASP.NET MVC then you know what I'm talking about.

IRouteConstraint
IRouteConstraint has been around for some time in MVC, but it is also available in Web API too because of course it is based on the same stack for routing.

Undoubtedly, the most difficult part of routes is debugging or getting the Regex right. I recently re-lived this experience when having to create a custom API route for a project something along the lines of

/api/{controller}/{model}/{road}/{id}

where {model} must exist in a list of valid string values and {road} is a pattern of XX9999 and then obviously the {id} must be an integer for the specific record in the list.

So, initially you start putting the Regex together for the id, "^\d+$", and then the road might be something like   "^[a-zA-Z]{2}\d{4}$".  But how should I handle the in list for the {model} param?

Sure we could put together the Regex for that, but debugging all of this is a pain even in the short term.  Also if the constraint itself is something of an edge case where the value must be a filename that exists, or a guid in memory etc; IRouteConstraint is the answer.

IRouteConstraint requires you to implement one method, Match, which returns a boolean. In the method below we are looking for one of the values being passed in the values[] parameter to a list used in the constructor.


    public class FromValuesListConstraint : IRouteConstraint
    {
        public FromValuesListConstraint(params string[] values)
        {
            this._values = values;
        }
        private readonly string[] _values;
        public bool Match(HttpContextBase httpContext,
            Route route,
            string parameterName,
            RouteValueDictionary values,
            RouteDirection routeDirection)
        {
            // Get the value called "parameterName" from the
            // RouteValueDictionary called "value"
            string value = values[parameterName].ToString();
             // Return true is the list of allowed values contains
            // this value.
            return _values.Contains(value, StringComparer.CurrentCultureIgnoreCase);
        }
    }


In order to use this from the WebApiConfig.cs class, create your route like the following.


config.Routes.MapHttpRoute(
               name: "CustomRouteNoDayOrAction",
               routeTemplate: "api/{controller}/{model}/{road}/{id}",
               defaults: null,
               constraints: new
               {
                   model = new FromValuesListConstraint("ford", "chevy", "dodge", "toyota"),
                   road = @"^[a-zA-Z]{2}\d{4}$",
                   id = @"^\d+$"
               }
);

When you run and test your routes, you can now put a break point on the FromValuesListConstraint Match method and debug the routing.


Read more →

Wednesday, February 6, 2013

South Florida Code Camp

,
I will be giving two talks this Saturday at South Florida Code Camp, being held at Nova University in Ft. Lauderdale, Fl.  For directions and more information visithttp://www.fladotnet.com/codecamp/. Schedule for other sessions here.

My Sessions


Read more →

Friday, February 1, 2013

Develop Windows 8 & Windows Phone Apps and Win Cash!

,
From February 1 through June 2013, publish a new Windows 8 or Windows Phone app and enter my sweepstakes page to win up to $1000 in cash prizes.  WHAT?!?!  

Pretty cool right.  Get extra $$ for what you are already doing.  Publish you app in the store the go to http://spboyer.me/appsforcash and submit your app.

3 Winners each month!
$1000
$500
$250

Follow me on twitter @spboyer and let me know when you submit it and I'll personally look at the app and give it a review and let all my friends to give it a look as well for extra exposure.

See official rules here


BONUS POINTS AND AWARDS

FREE NOKIA PHONE

If this is your FIRST Windows Phone App you may qualify for a Free Nokia Lumia Phone.


TELERIK WINDOWS 8 Controls

I will pick 1 Winner each month from the Windows 8 Submissions to receive a free licensed copy of Telerik's Windows 8 Controls

Read more →

Tuesday, January 29, 2013

Nothing great was ever achieved without enthusiasm...

,
Over the past month I have had the opportunity to give some thought to what I wanted to accomplish this year in my life, career, and health. And during those times of thought I have often gone back to a speech I listened or re-listened to by the late Jimmy Valvano.

Jimmy V was a great college basketball coach and was unfortunately diagnosed and later passed away from bone cancer. But shortly before his death he gave a riveting speech at the 1993 ESPN ESPY Awards. There are some great things he said, but one statement lost in many outtakes that stuck with me was

"Nothing great was ever achieved without enthusiasm" ...Ralph Waldo Emerson

I think about that statement and how it relates to life, but also how I approach code, software development and teaching. Enthusiasm is the name of the game.  I'm passionate in how I present it, teach it, talk about it and code it. 

The question I have always wondered is how can the few of us who think this way make that feeling contagious? Spread that disease?

I know how I feel after taking a good 5 mile run or so and beating a goal or my last time thinking, "hell yes!" and that's the same feeling I get when a project is complete or I inspire a developer to do something different or try a new path and then later they tell me "thanks, just what I needed".

Recently, after a .NET User Group meeting I sat and had a beer with a few friends from the group and we had this very discussion and the conversation was really good.  I heard stuff like...

"It's not their project...."

"...making the other guy money, why be passionate"

"...some companies are better at making their devs feel ownership..."

What are your thoughts?  What can make you more enthusiastic or pump up that 9-5'er you know at your office?

Start the conversation....
Read more →

Monday, January 28, 2013

Portable MVVM Light - Move Your View Models : Part 2

,
In the first part I covered how to get the initial project setup and share the ViewModels and ViewModelLocator between a Windows Phone 8 project and a Windows Store Application.  In this post, I'll add a DataService and a Model class that will be used to get the most recent posts from the Windows Phone Blog and display the results.

Adding DataService and Async to Portable Class Library

The purpose of the DataService in the context of this project is to retrieve the RSS feed from the Windows Phone Blog (http://blogs.windows.com/windows_phone/b/wpdev/rss.aspx) using the async methods available in the 4.5 Framework, return a collection of our Headline class object for the UI to handle and display.

Headline Class Model

The Headline class is the object that will be loaded and a collection of these will be built and returned from the data service method.  Create a new folder in the Mvvm.PCL project called "Model" and add a new file called Headline.cs.


    public class Headline
    {
        public string Title { get; set; }
        public string Description { get; set; }
        public string Url { get; set; }
        public DateTime Published { get; set; }
    }


IDataService

In good practice, create an interface for the DataService class.  This would allow for taking advantage of dependency injection if you chose to do so. Add a new interface file to the model folder called IDataService.cs.  Here is the interface:


namespace Mvvm.PCL.Model
{
public interface IDataService
{
void GetHeadlines(Action<List<Headline>, Exception> callback);
}
}

The interface defines a single method that accepts a delegate with a collections or List<T> of Headline and an Exception parameter.

DataService

Next, in the same folder, add the DataService.cs file and implement the interface.

    public class DataService : IDataService
    {
        public void GetHeadlines(Action<List<Headline>, Exception> callback)
        {
            throw new NotImplementedException();
        }
    }


HttpWebRequest

Most simple requests for data are done with the WebClient class, however this class is not available in Portable Class libraries and is really only an abstraction of what must be used and that is the HttpWebRequest.

Add a new method to the class called MakeAsyncRequest accepting a url (string) as a parameter and set the method to return a Task<string>. Within the method I'll use the Task.Factory.FromAsync method to call the url asynchronously returning the Task<WebRequest> then use a continuation to read the WebResponse.


        private static Task<string> MakeAsyncRequest(string url)
        {
            HttpWebRequest request = WebRequest.CreateHttp(url);
            request.Method = "GET";

            Task<WebResponse> task = Task.Factory.FromAsync(
                request.BeginGetResponse,
                (asyncResult) => request.EndGetResponse(asyncResult),
                (object)null);

            return task.ContinueWith(t => ReadStreamFromResponse(t.Result));
        }

        private static string ReadStreamFromResponse(WebResponse response)
        {
            using (Stream responseStream = response.GetResponseStream())
            using (StreamReader sr = new StreamReader(responseStream))
            {
                string strContent = sr.ReadToEnd();
                return strContent;
            }
        }

The GetHeadlines method can now be completed. First add the static url.

 private readonly string uri = "http://blogs.windows.com/windows_phone/b/wpdev/rss.aspx";


Then declare a variable to hold the results of the MakeAsyncRequest method and set the call with the await keyword so the UI thread is not blocked.

var t = await MakeAsyncRequest(uri);

You will also have to mark the method as async or the compiler will give you an error telling you to do so.


public async void GetHeadlines(Action<List<Headline>, Exception> callback)
{
...
}

The results returned are a string type and there are a couple of options to get it into a nice format to work with.  Your first option might be to use the Silverlight SyndicationFeed class which is in the System.ServiceModel.Syndication namespace. However, it is not inherently available in the portable classes and you'll need to go searching for it on your dev machine. Hint (C:\Program Files (x86)\Microsoft SDKs\Silverlight\v4.0\Libraries\Client\System.ServiceModel.Syndication.dll).

I'm choosing to use LINQ and doing Linq to XML here to get what I need out of the results string and inflate my classes and return it.

Here is the completed method.


        public async void GetHeadlines(Action<List<Headline>, Exception> callback)
        {
            // locally scoped exception var
            Exception err = null;
            List<Headline> results = null;
            try
            {
                var t = await MakeAsyncRequest(uri);
                StringReader stringReader = new StringReader(t);
                using (var xmlReader = System.Xml.XmlReader.Create(stringReader))
                {
                    var doc = System.Xml.Linq.XDocument.Load(xmlReader);
                    results = (from e in doc.Element("rss").Element("channel").Elements("item")
                               select
                                   new Headline()
                                   {
                                       Title = e.Element("title").Value,
                                       Description = e.Element("description").Value,
                                       Published = Convert.ToDateTime(e.Element("pubDate").Value),
                                       Url = e.Element("link").Value
                                   }).ToList();
                }
            }
            catch (Exception ex)
            {
                // should do some other
                // logging here. for now pass off
                // exception to callback on UI
                err = ex;
            }
            callback(results, err);
        }


That covers all of the code needed in the Portable Class(es) for getting the data, just need to edit the MainViewModel class constructor to create the DataService class, implement the new method and create a Headlines property.

MainViewModel
Add a new property for the headlines to be bound to by the UI.


        private List<Model.Headline> _headlines;
        public List<Model.Headline> Headlines
        {
            get { return _headlines; }
            set
            {
                _headlines = value;
                RaisePropertyChanged(() => Headlines);
            }
        }

In the constructor, create an instance of the DataService and execute the method.  I did mention earlier that there is an IDataService for DI, but for this example an concrete DataService class is created.


        public MainViewModel()
        {
            /// create a new dataservice class
            var service = new DataService();
       
            /// call getHeadlines passing headlines and exception delegate vars
            service.GetHeadlines((headlines, err) => {
                if (err != null)
                {
                    /// if there is an error should create a property and bind to it for better practices
                    System.Diagnostics.Debug.WriteLine(err.ToString());
                }
                else
                {
                    /// set the property
                    this.Headlines = headlines;
                }
            });
        }


Adding the UI Elements

Windows Phone

Open the MainPage.xaml page and wrap the previous TextBlock from part 1 in a StackPanel then add a ListBox.  Set the ItemsSource property of the ListBox to {Binding Headlines, Mode=TwoWay}, then add a simple template with a TextBlock to show the title of the story.


        <Grid x:Name="ContentPanel" Grid.Row="1" Margin="12,0,12,0">
            <StackPanel>
            <TextBlock Text="{Binding Hello, Mode=TwoWay}" Foreground="White" FontSize="18" />
            <ListBox ItemsSource="{Binding Headlines, Mode=TwoWay}">
                    <ListBox.ItemTemplate>
                        <DataTemplate>
                            <ListBoxItem>
                                <TextBlock Text="{Binding Title}" />
                            </ListBoxItem>
                        </DataTemplate>
                    </ListBox.ItemTemplate>
                     
            </ListBox>
            </StackPanel>
        </Grid>

Windows Store

The store app is just as easy.  In MainPage.xaml, add a GridView controls, set the ItemsSource to {Binding Headlines, Mode=TwoWay}, but in this case I'll define an ItemTemplate outside of the control called PCLItemTemplate and display the Title and the Description.


        <GridView ItemsSource="{Binding Headlines, Mode=TwoWay}" Grid.Row="1" ItemTemplate="{StaticResource PCLItemTemplate}" />
     

    <Page.Resources>
        <DataTemplate x:Key="PCLItemTemplate">
            <StackPanel Orientation="Vertical" Width="500" Height="250">
                <TextBlock Foreground="White" Text="{Binding Title}" FontSize="18" HorizontalAlignment="Center" Margin="20,10,20,0" TextTrimming="WordEllipsis"/>
                <TextBlock Foreground="White" Text="{Binding Description}" Style="{StaticResource ItemTextStyle}" HorizontalAlignment="Center" Margin="20,10" TextTrimming="WordEllipsis"/>
            </StackPanel>
        </DataTemplate>
    </Page.Resources>


Summary

 Running either apps presents the data in a different context and there is complete control as to the presentation and design choices based on the platform.  If you are looking to create Windows Store apps and/or Windows Phone applications  Portable Class Libraries is a great way to leverage code within your multiple platform target solution.  MvvmLight is a choice of mine and many others and fits very well too thanks to others in the community.


Full source code available here: http://sdrv.ms/WpBGqS
Read more →

Thursday, January 24, 2013

Portable MVVM Light - Move Your View Models

,

Portable Class Libraries 

Portable Class Libraries were added as a project type in the interest of creating an assembly that you could use across the .NET Framework, Silverlight, Windows Phone 7, or Xbox 360 platforms without modifications.  Well, not really that easy.  There is some work to do and as you get into the development of PCLs you'll find out that there is really a sliver of what you'd hope is supported. (http://msdn.microsoft.com/en-us/library/vstudio/gg597391(v=vs.110).aspx)

MVVM Light

Where I have found it for me is in Windows Store and Windows Phone (7.5 and 8) with MVVM Light. I have been using this MVVM framework exclusively for a few years now on Silverlight, WPF, Windows Phone and now Windows Store platforms and each release gets better.

Most recently, another MVVM Light fan, Oren Novotny (@onovotny) ported the MVVM Light project and made it possible to use it in a Portable Class Library. This is great, code reuse is the ultimate time saver. And when developing Windows Store Apps or a Windows Phone App; making a complimentary piece for the other just makes sense when the UI is really the only difference and even that is almost the same.

Example Project

Open Visual Studio 2012 and create a new project.  I like to start with the "Other Project Types" and select the Blank Visual Studio Solution; name it MvvmPortable and click save. Next add a Windows Store App (C# Blank Template) and call it Mvvm.Store. Add a new Windows Phone 8 project to the solution named Mvvm.Phone.

Now add a new project to the solution and select the "Portable Class Library" project type.


Click OK and then you'll be presented with a dialog to choose the platforms to be supported. Select all except XBox and for Windows Phone choose 7.5 or higher. (An error will occur when adding the nuget packages later if the 'Windows Phone 7.1 or higher' option is chosen).


Click OK and now the MVVM Light packages can start to be added via nuget.

Nuget

If you are  not using nuget, please pause here and go to nuget.org and/or install via Tools->Extensions And Updates.

Mvvm.PCL Project
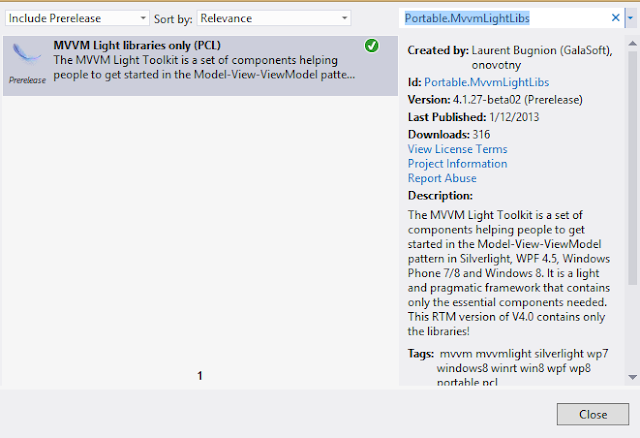
Right click the project and select the Manage Nuget Packages and in the dialog search for "Portable.MvvmLightLibs" and be sure that the Include Pre-release option is on, or you can use the package manager console and use the command install package portable.mvvmlightlibs -prerelease.


Repeat this process for the Windows Phone and Windows Store projects.

Next we need to add the MVVM Light specific platform assemblies to each of the respective platforms and do some setup and cleanup to make this all work.

Right Click the Windows Store project, select Manage Nuget Packages and search for MVVM Light and click the install button. In doing so, a few folders and files will be added to the project and you may see some errors which we'll clean up and repeat the process for the Phone project.


Moving ViewModelLocator,ViewModels and Wiring it Up

Now on to the fun! 

In the Mvvm.PCL project create a folder call ViewModel in the root of the project. Then expand the  ViewModel folder in the Mvvm.Store project and select the ViewModelLocator.cs and MainViewModel.cs file and cut and paste those to the ViewModel folder in the Mvvm.PCL project.

Open each of those and change the namespace to Mvvm.PCL.ViewModel from Mvvm.Store.ViewModel.

Since the ViewModelLocator has moved, the store app needs to know where to find it and the ViewModels, so open the App.xaml file in the Mvvm.Store project and change:

 xmlns:vm="using:Mvvm.Store.ViewModel" 
to

 xmlns:vm="using:Mvvm.PCL.ViewModel" 

and we need to modify the Resources section because the nuget installer for MvvmLight puts in some extra entries for the ViewModelLocator


    <ResourceDictionary>
        <vm:ViewModelLocator p7:Key="Locator" p8:IsDataSource="True"
                        xmlns:p8="http://schemas.microsoft.com/expression/blend/2008"
                        xmlns:p7="http://schemas.microsoft.com/winfx/2006/xaml" />
        <ResourceDictionary.MergedDictionaries>
                <!--
                    Styles that define common aspects of the platform look and feel
                    Required by Visual Studio project and item templates
                 -->
            <ResourceDictionary Source="Common/StandardStyles.xaml" />
        </ResourceDictionary.MergedDictionaries>
   
    </ResourceDictionary>

Finally for the Store app we'll go to the MainPage.xaml and set the DataContext and add a TextBlock to be filled from the MainViewModel.cs in the portable class library that we'll add following that.

In the MainView.xaml page add the DataContext property at the top of the page after the other declarations.


    ...
    xmlns:mc="http://schemas.openxmlformats.org/markup-compatibility/2006"
    mc:Ignorable="d"
    DataContext="{Binding Main, Source={StaticResource Locator}}"
    >
Next in the grid add the TextBlock as follows


    <Grid Background="{StaticResource ApplicationPageBackgroundThemeBrush}">
        <TextBlock Foreground="White" FontSize="42" Text="{Binding Hello, Mode=TwoWay}" />
    </Grid>
If you compile the store project at this point you will get some errors concerning MvvmLight confilcts. These occur because there are class duplicates in the portable and in the specific versions of the assemblies.  In order to alleviate the errors, expand the references folder in the project and select the *.Win8 assemblies and delete them.

Adding Hello to MainViewModel
Now that the wiring up of the relocated ViewModelLocator and MainViewModel are completed we can add the simple "Hello" property in the MainViewModel so it can be bound to in the store project.

Open MainViewModel.cs and add the property as follows:


        private string _hello = "Hello";
        public string Hello
        {
            get
            {
                return _hello;
            }
            set
            {
                _hello = value;
                RaisePropertyChanged(() => Hello);
            }
        }

Set the store project as the default project to run and either run in the simulator or on your local machine and you should see "Hello" appear in the top left of the application.


Wiring up the Phone Project

The process here is pretty much the same as was done for the store project.  Instead of moving the ViewModel folder in the phone project; it can be deleted.

Open the App.xaml and make the adjustments to let the application know where the ViewModelLocator and ViewModels are located. Note that making these references in the phone project are different that in the store project, albeit subtle can trip you up.

Change  

 ...xmlns:vm="clr-namespace:Mvvm.Phone.ViewModel" mc:Ignorable="d">

to

 ...xmlns:vm="clr-namespace:Mvvm.PCL.ViewModel;assembly=Mvvm.PCL">

then make the modifications to the Application.Resources portion as follows:

  <Application.Resources>
    <local:LocalizedStrings xmlns:local="clr-namespace:Mvvm.Phone" x:Key="LocalizedStrings" />
        <vm:ViewModelLocator p6:Key="Locator"
                         p7:IsDataSource="True" xmlns:p7="http://schemas.microsoft.com/expression/blend/2008"
                         xmlns:p6="http://schemas.microsoft.com/winfx/2006/xaml" />
    </Application.Resources>

Next, open the MainPage.xaml and add the DataContext declaration and the TextBlock as we did for the store application.


...
shell:SystemTray.IsVisible="True"
    DataContext="{Binding Main, Source={StaticResource Locator}}">

adding the TextBlock

        <Grid x:Name="ContentPanel" Grid.Row="1" Margin="12,0,12,0">
            <TextBlock Text="{Binding Hello, Mode=TwoWay}" Foreground="White" FontSize="18" />
        </Grid>

And finally as mentioned in the store project, you will get the assembly conflicts so be sure to remove the .*WP8 references in the phone project prior to building the solution here.

Run the application and you'll see the Hello presented in the same location on the phone app.


Wrapping Up

All of the other capabilities that you may or may not be familiar with in the MVVM Light framework is still available to you within the specific projects or of you'd like extract those as well too.  I find that the navigation and switching of the views is still best served within the specific platforms.

I have in my projects moved services negotiation for getting data into the PCL assembly using the Microsfoft.BCL.Async library via nuget too and that is also great but a little different depending on your experience with the platform and WebClient versus HttpClient requests.

Enjoy and feel free to ask questions.

Part 2 - Adding a Data Service


Read more →
Powered by Blogger.
 
Creative Commons License
TattooCoder.com by Shayne Boyer is licensed under a Creative Commons Attribution-ShareAlike 3.0 Unported License.