Showing posts with label WinRT. Show all posts

Saturday, August 24, 2013

Azure Mobile Services & Portable Class Libraries - Part 2 Authentication Cont'd

,
In Part 1 I covered a simple implementation of the Authentication feature and portable class libraries from the Azure Mobile Services SDK.  However, as mentioned in the "Good & Bad So Far" section; there is not a whole lot of code reuse other than the Azure endpoint and secret key.  Let's refactor a bit by adding some interfaces, conditional compile statements and the MVVM Light Event Bus to help the same solution operate cleaner.

The "after" code for part one is available here.

Building Our Core

PortableAzure.Core is our Portable Class Library that is being shared with the Windows 8 and  Windows Phone project in the attempt to reuse as much code as possible.  However, as mentioned in Part 1 the authentication portion of the Azure Mobile Service SDK is a platform specific implementation due to the UX pieces of that component and how it is presented varies.

Platform Adapter (PlatformAdapter.cs)

In the Services folder, add a new class called PlatformAdapter.cs.  This is an abstract class that will be used as the base class for the platform specific implementation.

    public abstract class PlatformAdapter
    {
        public static PlatformAdapter Current { get; set; }
        public abstract IIdentity Identity { get; }
    }

Identity (IIdentity.cs)

Add a new Identity interface, IIdentity.cs to be used as the implementation to execute the Authenticate method as well as store the MobileServiceUser upon logging in.

    public interface IIdentity
    {
        void Authenticate();
        MobileServiceUser User { get; set; }
    }


 Messages

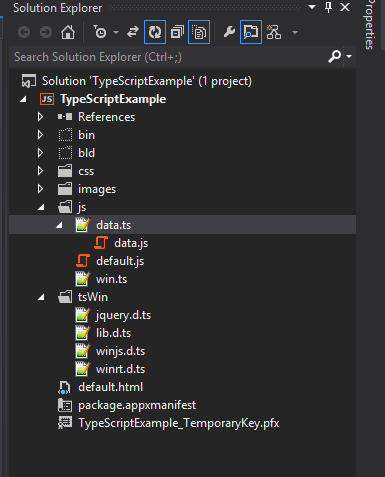
Add a Messages folder to the root and a class called LoginMessage.cs to newly created folder.

Using the Event Bus from MVVM Light, a LoginMessage will be sent from the platform specific MainPage.xaml then subsequently handled in the MainViewModel.  The LoginMessage is just an empty class at this point.

    namespace PortableAzure.Core.Messages {
        public class LoginMessage { } 
    }

Adding Adapters to the Platforms

On each plaftform we need to now inherit from the PlatformAdapter.cs class in the Services namespace from the Core library as well as implement the IIdentity interface thus replacing the code shown in part one with this code.

Windows Phone

Add an "Adapters" folder to the root of the project and then a Platform.cs class which inherits from PlatformAdapter.

namespace PortableAzure.Phone8.Adapters
{
    public class Platform : PlatformAdapter
    {
        public IIdentity _identity = new Identity();

        public override IIdentity Identity
        {
            get
            {
                return _identity;
            }
        }
    }
}


Next, add the Identity class which is where all of the heavy lifting is done for the login logic.

namespace PortableAzure.Phone8.Adapters
{
    public class Identity : IIdentity
    {
        public async void Authenticate()
        {
            var app = ((App)Application.Current);

            string message = string.Empty;

            while (this.User == null)
            {
                try
                {
                    User = await app.Azure.MobileService.LoginAsync(MobileServiceAuthenticationProvider.Twitter);

                    message = string.Format("You are now logged in - {0}", User.UserId);
                }

                catch (InvalidOperationException)
                {
                    message = "You must log in. Login Required";
                }
            }

            MessageBox.Show(message);
        }

        public MobileServiceUser User { get; set; }
    }
}   


Now that the Windows Phone implementation is complete we need to tell the Service library what is the current class is for the PlaformAdapater.  This is set in the App.xaml.cs class in the App contstructor:

public App()
{
   Azure = new AzureMobileServices();

   PortableAzure.Core.Services.PlatformAdapter.Current = new Platform();

   ...

Windows 8

To implement the PlatformAdapter class in the Windows 8 application, you could follow the same steps as documented for the Phone project, but that is duplication and not manageable over time.

So in this case we will use add the existing Identity and Platform classes then add conditional compile statements to the areas of the classes where needed to address the small differences for Windows versus Phone.

Add Existing item by holding the Alt key and dragging the file, or the whole folder from the Phone project to the Windows 8 Project.  Thanks Matt Hidinger for this little trick. You could also just go through the right click -> add existing -> add as link process but now that you know the "Hold Alt + Drag" why??

Here are the completed Platform and Identity classes.  You will need to repeat the setting of the current platform in the App.xaml.cs constructor.

Platform.cs


#if NETFX_CORE

namespace PortableAzure.Win8.Adapters

#endif


#if WINDOWS_PHONE

namespace PortableAzure.Phone8.Adapters

#endif

{
    public class Platform : PlatformAdapter
    {
        public IIdentity _identity = new Identity();

        public override IIdentity Identity
        {
            get
            {
                return _identity;
            }
        }
    }
}

Identity.cs

#if NETFX_CORE

namespace PortableAzure.Win8.Adapters

#endif


#if WINDOWS_PHONE

namespace PortableAzure.Phone8.Adapters

#endif

{
    public class Identity : IIdentity
    {
        public async void Authenticate()
        {

#if WINDOWS_PHONE

            var app = ((App)Application.Current);

#endif


#if NETFX_CORE

            var app = ((PortableAzure.Win8.App)(Windows.UI.Xaml.Application.Current));

#endif

            string message = string.Empty;

            while (this.User == null)
            {
                try
                {
                    User = await app.Azure.MobileService.LoginAsync(MobileServiceAuthenticationProvider.Twitter);

                    message = string.Format("You are now logged in - {0}", User.UserId);

                }

                catch (InvalidOperationException)
                {
                    message = "You must log in. Login Required";
                }
            }

#if WINDOWS_PHONE

            MessageBox.Show(message);

#endif

#if NETFX_CORE

            var messageDialog = new Windows.UI.Popups.MessageDialog(message);

            await messageDialog.ShowAsync();

#endif

        }

        public MobileServiceUser User { get; set; }

    }

}

Note, be sure to use the full namespace OR add more #if at the top for the imports.

Cleanup & Consolidation

Now that there is a single place where the application executes the call to Authenticate, through the magic of #if and reusing existing files, time to delete some code.  Nice right?

In Part, each of the front end projects had code in the MainPage.xaml.cs file within the "Loaded" handler to execute the Azure authentication code.  That can be replaced by using the Event Messaging Bus provided by MVVM Light and sending the LoginMessage.

Messenger.Default.Send<LoginMessage>(new LoginMessage());

In the MainViewModel, add the handler in the constructor and the Login subroutine to call the Authenticate method in the Identity interface.

 public MainViewModel()
 {
     Messenger.Default.Register<LoginMessage>(this, m => { Login(); });
  }

 public void Login()
 {
     if (PlatformAdapter.Current.Identity.User == null)
     {
         try
         {
           PlatformAdapter.Current.Identity.Authenticate();
         }
          catch (Exception ex)
         {
             Debug.WriteLine(ex.ToString());
         }
     }
 }

Now when either platform is run, the Login entry point happens in the MainViewModel upon loading of the main page.  Another option, if you wanted to eliminate the messaging, would be to add a login button and have the ICommand call the Login method thus eliminating any code behind in the MainPage.xaml but that depends on your applications needs.

Windows Phone
Windows 8 / RT


Wrapping Up Authentication

One item to mention, in this example every time the app is run on either platform the user will have to authenticate.  When the MobileServiceUser is successfully authenticated, there are two properties that you can save; MobileServiceAuthenticationToken and UserId respectively.  In a subsequent execution of the app, create a new instance of the MobileServiceUser and set the CurrentUser property of the AzureMobileService.MobileService. For Example:

var user = new MobileServiceUser(mySavedUserId);

user.MobileServiceAuthenticationToken = mySavedMobileServiceAuthenticationToken;

App.MobileService.CurrentUser = user;

Part 1 and Part 2 has shown a simple introduction of how to use portable class libraries with Azure Mobile Services and through the use of a little indirection reuse all the code possible BUT also keep the MVVM implementation and code organization as clean as possible.

Final Code for Part 2 located here

Read more →

Monday, August 5, 2013

Azure Mobile Services & Portable Class Libraries - Part 1 Authentication

,
Azure Mobile Services is undoubtedly one of the best platforms to emerge from the Azure group over the last year. If you are a mobile developer and not taking advantage of it; I encourage you to do so.  There are many video and blog posts available to get you started at http://www.windowsazure.com/en-us/develop/mobile/ .

One of the features you may not be aware of is Azure Mobile Services is a Portable Class Library (PCL) available through nuget. If you are not familiar with PCL's see my "Move Your ViewModels" series.

There is a caveat however when using Azure Mobile Services in your PCL; although all of the data calls to the services are available, using the Identity feature is not and must be implemented in a platform specific way.

The Identity feature allows your application to leverage the user's Microsoft, Google, Facebook or Twitter account to login to the application and abstract the overhead of OAuth or provider specific authentication models into a single call.

var user = MobileService.LoginAsync(MobileServiceAuthenticationProvider.Twitter);

The Challenge - Maximize Code Reuse

There is no secret that Model-View-View-Model (MVVM) is a preferred pattern for xaml developers, but it is also know that sometimes breaking patterns is needed either due to time constraints or other restrictions.

In the effort to maintain the MVVM pattern in this scenario a platform abstraction is needed to accomplish to goal of reusing as much code as possible.  Matt Hidinger did a great talk at BUILD 2013 this year on this topic, give a watch on his blog.

Scenario - Setting up your solution

I won't walk through setting up a Mobile Service on Azure, see this post for instructions, so let's assume we have a Windows Phone & Windows Store application where we'd like to share code in a Portable Class Library and allow the user to login with their Twitter account. The project solution should contain 3 projects:


  • PortableAzure.Win8 - Windows 8 Blank  Application
  • PortableAzure.Phone8 - Windows Phone 8 Application
  • PortableAzure.Core - Portable Class Library Project
    •  .NET Framework 4.0 & higher
    • Windows Phone 7.5 & higher
    • Windows Store Apps

I have added the following nuget packages to the projects

  • Microsoft.Net.Http
  • Portable.MvvmLightLibs
  • WindowsAzure.MobileServices

There is some plumbing related to the MVVM structure that is needed as well.  Get the "before" code here http://sdrv.ms/14ufYYZ , your solution explorer should look like the image here ->.


Adding Azure 


Assumption(s) - you have created a Azure Mobile Service.

First, you will want to add a new class to the Services folder in the PortableAzure.Core project and call it AzureMobileServices. I have also added an empty interface out of habit and to use for IoC (Inversion of Control).

namespace PortableAzure.Core.Services
{
    public class AzureMobileServices : IAzureMobileServices
    {
        public MobileServiceClient MobileService = new MobileServiceClient(
            "https://portableazure.azure-mobile.net/",
            "[your app key]"
        );
        public AzureMobileServices()
        {
        }
    }
    public interface IAzureMobileServices
    {
    }
}


The app key and url comes from the Azure portal when you complete the setup; you will want to choose "Connect to an Existing Project". Either Windows Phone or Windows 8 is an acceptable choice.

Next step is to setup the Twitter authentication, or other provider of your choosing.  (reference)

Now that that is complete, we'll add the necessary platform specific code to the Windows Phone & Windows 8 platforms to prompt the user to login using their Twitter account.

Windows Phone

Open the App.xaml.cs and create a new property for the AzureMobileService class from the Core project.

    public partial class App : Application
    {
        /// <summary>
        /// Provides easy access to the root frame of the Phone Application.
        /// </summary>
        /// <returns>The root frame of the Phone Application.</returns>
        public static PhoneApplicationFrame RootFrame { get; private set; } 
        public AzureMobileServices Azure { get; private set; } 
        /// <summary>
        /// Constructor for the Application object.
        /// </summary>
        public App()

Then in the App constructor create the new instance of the AzureMobileService class.

Azure = new AzureMobileServices();
 In order to prompt the user, open the MainPage.xaml.cs file and add the following code to the PhoneApplicationPage_Loaded event.

 private async void PhoneApplicationPage_Loaded(object sender, RoutedEventArgs e)
        {
            MobileServiceUser user = null;
            while (user == null)
            {
                string message;
                try
                {
                    user = await((App)Application.Current).Azure.MobileService.LoginAsync(MobileServiceAuthenticationProvider.Twitter);
                    message = string.Format("You are now logged in - {0}", user.UserId);
                }
                catch (InvalidOperationException)
                {
                    message = "You must log in. Login Required";
                }
                MessageBox.Show(message);
            }
        }


Windows 8

The implementation is essentially the same for Windows 8 with the exception of how to show a message box.

private async void Page_Loaded(object sender, RoutedEventArgs e)
        {
            MobileServiceUser user = null;
            while (user == null)
            {
                string message;
                try
                {
                    user = await((App)Application.Current).Azure.MobileService.LoginAsync(MobileServiceAuthenticationProvider.Twitter);
                    message = string.Format("You are now logged in - {0}", user.UserId);
                }
                catch (InvalidOperationException)
                {
                    message = "You must log in. Login Required";
                }
                var dialog = new MessageDialog(message);
                dialog.Commands.Add(new UICommand("OK"));
                await dialog.ShowAsync();

            }
        }

The Good & Bad - so far

To this point everything is working great and we have now effectively added the authentication to each platform using the Identity features in Azure Mobile Services. But other than the url and the key of the Azure Mobile Service; there isn't a lot of code reuse in this scenario.

This is a necessity when there are platform specific implementations of a feature.  In this case, the UI needs to present differently and cannot re-use the xaml or controls that are a part of the login utility for the specified provider.

The bad part of this is it breaks the MVVM pattern to a degree by putting some of the logic in the code behind.

In the next installment, I'll show how to add an abstraction layer and use the MVVM Light Event Bus to push some of this code back to our view models.

Here is the completed code for Part 1.


Read more →

Tuesday, October 9, 2012

TypeScript for Windows 8 Store Apps

,

What is TypeScript? 

See http://www.typescriptlang.org

TypeScript was recently released and has become the new hot topic.  One of the questions I have asked and heard is can we use this for developing Windows Store Applications with Javascript and have the cool features that have been shown in the videos and examples.

One of the great features was the split window feature where you can code in TypeScript on the left and upon hitting save, it compiles to Javascript on the left. So I fired up a new Javascript Windows Store project in Visual Studio to give it a shot to see if it all works.  Before we get started make sure that you have the following:


Create a New Project

Start by creating a new project. I just went with the "Blank App" template for purposes of this post, but any of the installed templates are certainly applicable.


Click "OK" and you will see that in the Solution Explorer the following structure.  Expand the "js" folder to see the javascript files that are there by default.


Adding the TypeScript Functionality

There are a couple of files that are needed to making TypeScript and Windows 8 play nicely together, as well as jQuery.  The best way to describe these is that they are wrappers for the WinJS, WinRT and JQuery or helpers.  There is also lib.d.ts which is a noted in the file as "ECMA Script APIs

Click on any of these to see the source.

I downloaded all of these and now put them in a folder called tsWin in the project for referencing in my other ts files.

In the examples that have been shown online, by simply adding a .ts file to your project and hitting save; Visual Studio will automatically create the .js file and associate it to the TypeScript file and show the compiled javascript in the split window.  However, this is not the case in a Windows Store Application...Yet.

But we can still make this all work, here's how.

Add a new javascript file to the js folder BUT name it with the extension .ts. I named the file Data.ts.  Next, repeat and name the file Data.js. Your solution explorer should look like this now. Note that I also added the tsWin folder and the mentioned files as well.


Now you can open the data.ts file and get the split window that has been presented and see that the .js file that is compiled on the right. 

There is another file here that is important as well called win.ts, it adds a wrapper for setImmediate and references the winrt.d.ts and winjs.d.t.s files.  I reference this file in any of the TypeScript that I am using but put it within the js folder.

A Quick Example

So here is a quick example that will walk through the following concepts:
  • Creating a simple class
  • Extending the class through inheritance
  • Using Location Services
  • Retrieving a static map from Google Maps API
  • Inserting the image control onto the page.

Open the data.ts file.  We will first create the initial Location class and the MyLocation class in TypeScript  and see the output to javascript.

TypeScript:

///<reference path='win.ts'/>

module Data {

    class Location {
        longitude: any;
        latitude: any;
        url: string;
    }

    class MyLocation extends Location {
        retrieved: any;
    }
};


Javascript:


var __extends = this.__extends || function (d, b) {
    function __() { this.constructor = d; }
    __.prototype = b.prototype;
    d.prototype = new __();
}

var Data;
(function (Data) {
    var Location = (function () {
        function Location() { }
        return Location;
    })();   

    var MyLocation = (function (_super) {
        __extends(MyLocation, _super);
        function MyLocation() {
            _super.apply(this, arguments);
        }
        return MyLocation;
    })(Location);   
})(Data || (Data = {}));
; ;

Screen shot just to visualize what's show in VS 2012

Not sure about you, but I wouldn't want to write the inheritance code for Javscript, TypeScript kills it there! Ok, let's move on. Next I will add the function to get the location from the device, populate the myLoc object and then create and insert the image into the body of the page.

Note that the TypeScript and Javacript to do this are one and the same, difference here is that we have type safe code.

TypeScript:


  var locator = new Windows.Devices.Geolocation.Geolocator();

  locator.getGeopositionAsync().then(function (pos) {
  
      var myLoc = new MyLocation();
      myLoc.latitude = pos.coordinate.latitude;
      myLoc.longitude = pos.coordinate.longitude;

      myLoc.retrieved = Date.now;
      myLoc.url = "http://maps.googleapis.com/maps/api/staticmap?center="
          + myLoc.latitude + "," + myLoc.longitude
          + "&zoom=12&size=400x400&sensor=false";

      // add a new img tag to the document
      var img = document.createElement("img");
      // set the src and style
      img.setAttribute("src", myLoc.url);
      img.setAttribute("style", "height:400px;width:400px;");
        
      // get the paragraph tag we set for the location of the content
      var p = document.body.getElementsByTagName("p")[0];
      p.appendChild(img);


When you hit save you'll notice that on the status bar at the bottom left of Visual Studio it will read "Compiling TypeScript..." and then the resulting Javascript will refresh/show on the right pane.  It is important to note that if you have the ,js file open you will get the prompt "Such and such file is open would you like to reload".

Before you run the application make sure that you enable the Location capabilities in the package manifest file as shown below or you will get a nasty message box letting you know you didn't.


Ok, hit F5 and see the results.

First you'll get the let me use location services prompt.


And then the page is presented with the downloaded map.


That's a little get started primer on TypeScript and Windows Store Apps!  Pretty awesome stuff.

Tips & Tricks

Content / Package Type

Make sure that all of the TypeScript (.ts) files are marked as None so they are not distributed unnecessarily with your application. 

Debugging

You can put break points in the generated .js files and have access to the immediate window, watch etc.

Dependent Files

I like to see the dependent files like I'm used to seeing in other project types (see below).  Since this is not built in to the Windows Store functionality with TypeScript yet, here is how to do it.


You need to edit the project file.  The best way to do this is to use the Power Commands for Visual Studio extension, or browse to it and open in notepad or some other text editor.

PowerCommands for Visual Studio
For this solution locate the data.ts reference in the file and change it to the following:

    <Content Include="js\data.js">
      <DependentUpon>data.ts</DependentUpon>
    </Content>
    <None Include="js\data.ts" />

Save the file and reload the project and you can now see that the .js file will be shown below the .ts file.

Conclusion

I have had some real fun getting into this and trying it out with the Store apps.  Coming from a C# / XAML life for the last many years, it will be interesting for me to back to some scripting.  I like the option and I see some really cool opportunities with TypeScript.

Read more →

Tuesday, September 25, 2012

RadCustomHubTile from Telerik for Windows 8 UI

,

Introduction

Telerik recently released their Windows 8 UI Controls to RC on September 18th (see post here), and this is probably on the first in a series of posts I will put out showing them off.

The first control here is the RadCustomHubTile.  I chose this because I am in the process of porting my Find Amber app from Windows Phone to Windows 8 and I wanted to transition the app without drifting too far from the spirit of the original app. 

RadControls from Telerik used here for
Current List and Search & Stats section
You can see from the screen shot that I had already used the RadControls for Windows Phone, so now I can bring some of the design through.

The controls do support both HTML and XAML design, if the current version of the controls do not include either or; I assure you the version you seek is in development and on its way.

Getting Started

The RadCustomHubTile allows any user-defined content rather than predefined parts that you may find in a RadHubTile or RadSlideTile, and as in most if not all of the Telerik controls; MVVM as well as code based binding is supported.

Prior to trying this example, please download the controls from Telerik and note that I am using MVVM Light as the MVVM Framework.  You can see how to install MVVM Light via nuget by opening the Package Manager console and running "Install-Package mvvmlight".  If you have any trouble with that please see http://mvvmlight.codeplex.com or contact me via twitter (@spboyer) OR see my blog post on how to get started with Windows 8 and MVVM Light.

In the following example you will see:
  • MVVM Binding
  • Content locally bound
  • Content bound from an internet URI
  • Complex front and back content for the tile
This is a moderately simply example.  I started with a Blank Solution in Visual Studio 2012 and called it RadCustomHubTile (in retrospect probably should have stuck with App1).

Install the MVVM Light Framework via nuget (see above), you will have to make a change to the App.xaml file.  When installing this, it adds the reference to the namespace in the old way

  xmlns:vm="clr-namespace:RadHubTile.ViewModel"

you need to change this to:

 xmlns:vm="using:RadHubTile.ViewModel"

 A little house keeping to make it look nice. Yes I care what it looks like even for this. Go ahead and add the following below the <Grid> tag to add the header to the initial page.  You can change the title if you like and run (F5).

<Grid.RowDefinitions>
 <RowDefinition Height="140"/>
 <RowDefinition Height="*"/>
</Grid.RowDefinitions>


<Grid>
 <Grid.ColumnDefinitions>
  <ColumnDefinition Width="Auto"/>
  <ColumnDefinition Width="*"/>
 </Grid.ColumnDefinitions>
 <Button x:Name="backButton"  Style="{StaticResource BackButtonStyle}"/>
 <TextBlock x:Name="pageTitle" Text="Rad Custom Hub Tile" Grid.Column="1" IsHitTestVisible="false" Style="{StaticResource PageHeaderTextStyle}" Foreground="#FFADD808"/>
</Grid>

Title and Back button


Next, lets add the RadCustomHubTile Control, and the best way to do this is to simply drag it from the toolbox right into the spot within the XAML. This is something you could not do in Windows Phone which is a big step in my opinion.

It will add the namespace and the references to the project.

To clean it up a little and make sure that you are using within the design guidelines, wrap the RadHubControl with a Grid with the following settings.

<Grid Grid.Row="1" Margin="115,0,0,0">


  <Primitives:RadCustomHubTile />


</Grid>

If you are wondering why my RadCustomHubTile is prefixed, it is because I have changed or altered the declaration at the top of the page to be the following (this matches my Phone app stuff).

xmlns:Primitives="using:Telerik.UI.Xaml.Controls.Primitives" 

Setting Front and Back Content

The content for the front and back are defined by setting the content within the <RadCustomHubTile.FrontContent> and <RadCustomHubTile.BackContent> respectively.  Pretty simple, so here is an example:

<Primitives:RadCustomHubTile Height="300" Width="300">
 <Primitives:RadCustomHubTile.FrontContent>
  <Grid>
   <Image x:Name="imgBlogger" 
        Source="{Binding Photo, Mode=TwoWay}" 
        Height="300" Width="300" 
        Stretch="UniformToFill" Margin="0" 
        HorizontalAlignment="Left" 
        VerticalAlignment="Center" />


   <Rectangle Height="65" Fill="#99000000" VerticalAlignment="Bottom" />

   <StackPanel Orientation="Horizontal">
    <TextBlock  Text="Blogger:" 
        Foreground="White" Width="126" Height="43" 
        VerticalAlignment="Bottom" 
        Margin="10,0,0,14" Style="{StaticResource SubheaderTextStyle}" 
        HorizontalAlignment="Left" />

    <TextBlock  Text="{Binding UserName}" 
        Foreground="White" Height="43" 
        VerticalAlignment="Bottom" Margin="0,0,0,14" 
        Style="{StaticResource SubheaderTextStyle}"/>
   </StackPanel>
  </Grid>
 </Primitives:RadCustomHubTile.FrontContent>

 <Primitives:RadCustomHubTile.BackContent>
  <Grid>
   <Image x:Name="img" 
         Source="{Binding Thumbnail, Mode=TwoWay}" 
         Height="300" Width="300" 
         Stretch="UniformToFill" Margin="0" 
         HorizontalAlignment="Left" 
         VerticalAlignment="Center" />

   <Rectangle Height="65" Fill="#99000000" VerticalAlignment="Bottom" />

   <TextBlock  Text="{Binding Title, Mode=TwoWay}" 
        Foreground="White" Width="270" Height="30" 
        VerticalAlignment="Bottom"  
        Margin="0,0,0,30" Style="{StaticResource BasicTextStyle}" />

   <TextBlock  Text="{Binding SubTitle, Mode=TwoWay}" 
        Foreground="White" Width="270" Height="30" 
        VerticalAlignment="Bottom" Margin="0,0,0,5" 
        Style="{StaticResource BasicTextStyle}"/>
  </Grid>
 </Primitives:RadCustomHubTile.BackContent>
</Primitives:RadCustomHubTile>


Note that you will want to wrap your content with the FrontContent / BackContent tags in Grid, StackPanel etc as the designer will give you the "Content cannot be set more than once error".

Here is the MainViewModel that is bound. Note that the Blogger image (me), is pulled from an internet source uri and the back image is pulled from the project itself. The string properties are bound simply.

using GalaSoft.MvvmLight;
using System;
using Windows.UI.Xaml.Media;
using Windows.UI.Xaml.Media.Imaging;

namespace RadHubTile.ViewModel
{
    public class MainViewModel : ViewModelBase
    {
        /// <summary>
        /// Initializes a new instance of the MainViewModel class.
        /// </summary>
        public MainViewModel() { }

        public string Photo
        {
            get { return "https://blogger.googleusercontent.com/img/b/R29vZ2xl/AVvXsEgwU-gMFDLVqD7kgEEeGFpbdzX1aU0iuyWU14v5iyaPP7wqCYfkSykw-RzbcyYn-mO3luv8stH2m61RKJ4y5KpjmVVeh2MdTbxRx3AE3SxbsfoshmzKwfzoOir42-2DLZTEAA8SBO3Q-rs/s1600/profilepic.png"; }
        }

        public string UserName
        {
            get { return "Shayne Boyer"; }
        }

        public ImageSource Thumbnail
        {
            get { return new BitmapImage(new System.Uri(new Uri("ms-appx:"), "/Assets/RadCustomHubTile.png"));}
        }

        public string Title
        {
            get { return "Telerik Windows 8 UI Controls"; }
        }

        public string SubTitle
        {
            get { return "RadCustomHubTile"; }
        }
    }
}


So what does it all look like?

Front


Back


One other item to note is that you can alter the duration of the flip/rotation by setting the UpdateInterval which is a TimeSpan. So setting the value to "0:0:5" would be equal to 5 seconds.  There is also FlowDirection and many other properties to customize the Tile to your liking.  I'd like to see what you can do with it.  Download the controls today and let me know what you working on and if you have any questions.


Read more →

Sunday, August 26, 2012

Getting Started w/ Windows 8, MVVM Light and EventToCommand

,
Now that Windows 8 and Visual Studio are in RTM I wanted to put together a quick entry for those Windows Phone developers making the transition to Windows 8 development with their MVVM Light skills.

Laurent Bugnion, is the creator of the MVVM Light toolkit and I, as well as many others, have been using this for Windows Phone development for a while now.  I am porting on of my applications to Windows 8 and wanted to take the knowledge of this toolkit to the new platform hoping that there were either some new enhancements and/or not many changes so that I could just go.  Well that was the deal.

MVVM Light Toolkit for Windows 8 RTM

The latest installer for the toolkit, "MVVM Light Toolkit V4 RTM", is available from CodePlex. According to Laurent's blog it is a side by side install with previous versions:

MVVM Light for Windows 8 is a side-by-side install with the standard MVVM Light V3 or V4 beta. Simply download and run the MSI from Codeplex. As usual, the last step of the installation performs a “/setup” of Visual Studio to actualize the project template cache, and unfortunately this last step can last very long. Please be patient and don’t cancel before the end! The installation process is very similar to that described on the MVVM Light installation page (except that there is no NuGet installer for VS11 yet).
The following link states the summary of the ported components from the previous versions, but I'll paraphrase here:

  • ObservableObject including all ways to raise PropertyChanged. 
  • ViewModelBase including all ways to raise PropertyChanged. 
  • Messenger including all message types except DialogMessage (see below). 
  • RelayCommand with and without parameter. 
  • SimpleIoc which might well be the very first IOC container working on Windows 8. 
Man do I love the SimpleIoc! Makes adding the new views soooo much easier than in the Windows Phone version.

There are a few missing components, one of which is EventToCommand, however thanks to a new friend I have made, Joost van Schaik (see his blog here),  there is a solution to that and it's available as a nuget package with some additional behavior features I encourage you to look into but I'll at least cover the EventToCommand features he offers.

Getting Started

MVVM Light Project Template

After installing the toolkit you will see that there is a new project template available in the Visual Studio 2012 New Project Dialog

Noted as "Windows Metro Style"

Name the project "MvvmLight_Walkthrough" and click Ok.

The project template is simple, but add some new features that were not in previous versions of the toolkit. In the Solution Explorer you'll notice a Design folder with a class called DesignDataService. This is a great feature; the default template putting in a design data class repository.

Second, as in the past version of the toolkit there is the normal ViewModelLocator class, but in this version there is new feature - SimpleIoc, a container class which if you are like me had everything else in a container for DI with the exception of the ViewModels unless you rolled your own.


public class ViewModelLocator

    {

        static ViewModelLocator()

        {

            ServiceLocator.SetLocatorProvider(() => SimpleIoc.Default);


            if (ViewModelBase.IsInDesignModeStatic)

            {

                SimpleIoc.Default.Register<IDataService, Design.DesignDataService>();

            }

            else

            {

                SimpleIoc.Default.Register<IDataService, DataService>();

            }


            SimpleIoc.Default.Register<MainViewModel>();

        }


        /// <summary>

        /// Gets the Main property.

        /// </summary>

        [System.Diagnostics.CodeAnalysis.SuppressMessage("Microsoft.Performance",

            "CA1822:MarkMembersAsStatic",

            Justification = "This non-static member is needed for data binding purposes.")]

        public MainViewModel Main

        {

            get

            {

                return ServiceLocator.Current.GetInstance<MainViewModel>();

            }

        }


        /// <summary>

        /// Cleans up all the resources.

        /// </summary>

        public static void Cleanup()

        {

        }


And last, in the Model folder, Laurent has been kind enough to also include an IDataService interface and DataService class to show in the example how to use the real time and design time data models. These are all wired up in the ViewModelLocator as show above.

Now if we simply run the application you should get the following to make sure it's all good to go!

Running in the Simulator

As you may or may not notice, this is not to dis-similar from the previous project template test from the previous version.

MainViewModel

The binding of the ViewModel to the View is the same as it was in the previous model and there are no noticeable changes to the ViewModelTemplate.  On thing to note is that all options for RaisePropertyChanged are included in this release where as in the previous version you would have to get the "Pre-release" version from nuget in order to use them. For example, the built in template puts in the following:


/// <summary>

        /// The <see cref="WelcomeTitle" /> property's name.

        /// </summary>

        public const string WelcomeTitlePropertyName = "WelcomeTitle";


        private string _welcomeTitle = string.Empty;


        /// <summary>

        /// Gets the WelcomeTitle property.

        /// Changes to that property's value raise the PropertyChanged event.

        /// </summary>

        public string WelcomeTitle

        {

            get

            {

                return _welcomeTitle;

            }


            set

            {

                if (_welcomeTitle == value)

                {

                    return;

                }


                _welcomeTitle = value;

                RaisePropertyChanged(WelcomeTitlePropertyName);

            }

        }

Noticeably where RaisePropertyChanged is using a string value, one of the options now available in the release is to remove the  WelcomeTitlePropertyName variable and then change


RaisePropertyChanged(WelcomeTitlePropertyName);


to

RaisePropertyChanged(() => WelcomeTitle);


The other nice benefit here is that the template has also put in the wiring for injecting the IDataService into the constructor for the ViewModel.  Some of these little thing we developers either take for granted that someone has gone through the trouble of putting the plumbing in there or call it the boring work that has to be done before we get the real work done.  You can easily put other dependencies in the constructor here and then just add the mappings in the constructor of the ViewModelLocator by simply registering the types with the SimpleIoc container.


public MainViewModel(IDataService dataService)

        {

            _dataService = dataService;

            _dataService.GetData(

                (item, error) =>

                {

                    if (error != null)

                    {

                        // Report error here

                        return;

                    }


                    WelcomeTitle = item.Title;

                });

        }


Now What?.

A simple example here is to add some content to the MainPage and see how we navigate to a second view.  I won't bore you with the details of adding in the controls to the page but here's what the page should look like when you're done. 

Added a little MvvmLight color for fun

EventToCommand

Now lets just add a prompt to the submit button. But wait, what where's my EventToCommand???  Sure with the button there is a Command property and you can set that to an ICommand in the ViewModel and everything is happy.  But, there are plenty of controls, both baked into WinRT and third party controls that do not have that property. So, for simplicity sake I'm using this control and will get the EventToCommand back in your toolbox, or your Joostbox I should say.

Off to Nuget!

I had this issue where I was looking for the behaviors when porting an app I was working on and could find the dang behaviors in Blend so I went to nuget and did some searching and there wasn't anything that was shaking my fancy. Then I came across Joost van Schaik (see his blog here) and his WinRTBehaviors library and just so happens I hit him in the middle of uploading the nuget package for Win8nl.

Now this is a package of Behaviors that was originally a Windows Phone 7 library and It's now growing in its own direction and now contains some Windows 8 specific stuff (according to nuget). So let's get it installed real quick.

Install the package by typing the following into the Nuget Package Manager Console or searching for Win8nl in the package explorer.

PM> Install-Package Win8nl

It will add the library and the necessary dependencies to the project, which include WinRTBehaviors. For more information on the other behaviors there check out Joost's blog.

Adding EventToCommand 

First, lets add the references to the XAML page:

xmlns:WinRtBehaviors="using:WinRtBehaviors"

xmlns:Win8nl_Behavior="using:Win8nl.Behaviors"

Next, locate the button control and add the following inside the button XAML:


            <Button x:Name="btnSubmit" Content="Submit"    

                    FontFamily="{StaticResource MyFont}" FontSize="{StaticResource MyFontSize}"

                    HorizontalAlignment="Center" Margin="0,20,0,0">


                <WinRtBehaviors:Interaction.Behaviors>


                    <Win8nl_Behavior:EventToCommandBehavior Event="Tapped"       

                                                  Command="AreYouSureCommand"        

                                                  CommandParameter="{Binding MyName}"/>


                </WinRtBehaviors:Interaction.Behaviors>


            </Button>


Now, open the MainViewModel.cs code and we can add the command for the new behavior here when the button is tapped.

As usual the Command property is expecting an ICommand, add the following code to the MainViewModel and return a new instance of RelayCommand to execute whatever behavior you wish.  In this example, I'm just doing a little popup to show whatever the user input into the myName TextBox.


public ICommand AreYouSureCommand

        {

            get

            {

                return new RelayCommand<string>((p) =>

                {


                    var msg = new MessageDialog(string.Format("Hi there {0}", p));


                    msg.ShowAsync();


                });

            }

        }


See the result here:


And that is EventToCommand for MVVMlight for Windows 8!

There are many more behaviors in the WinRTBehaviors library that you should take advantage of, for me the most notable ones being FlipViewPanoramaBehavior and NavigationService being ported to Windows 8.


Read more →
Powered by Blogger.
 
Creative Commons License
TattooCoder.com by Shayne Boyer is licensed under a Creative Commons Attribution-ShareAlike 3.0 Unported License.