I have recently spent some time with Telerik's new product offering for cross mobile development called Icenium and I have to say it is quite nice. Paired with KendoUI Mobile you can't go wrong with a great set of tools for cross mobile platform development if you are an HTML + CSS + JavaScript developer.


Read more →
Icenium
Icenium is a cloud based IDE, there is also a Windows WPF Click-Once app, that allows you as a developer to leverage your existing HTML, CSS and JavaScript skills to develop hybrid cross mobile platform applications. Assistance of publishing your applications to the Google Play and Apple Store, integrated debugging and development environment, source control integration (including Git) and much more. See http://www.icenium.com for more information.
I will mention also that the underlying bits of Icenium is PhoneGap (Apache-Cordova) which provides and API through JavaScript (cordova.js) to the device functions such as the camera other hardware capabilities. For more information on that piece, Jim Cowart (@ifandelse) recently did a blog entry on their blog - "Demystifying Cordova and PhoneGap".
Getting Started
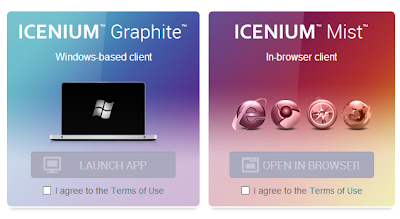
Head over to Icenium.com and click the "Get Started" button. Choose either the browser (cloud) based IDE or download the Windows app.

Once the application is launched select New Project -> Cross Platform Device Application (Kendo UI Mobile). Name the project "MyBloodPressure" and click Ok.

In doing so, Icenium presents the built in "Hello World" type template. Shows how geolocation, transitions, styling using Kendo UI Mobile etc. If you run the application by either hitting F5 or clicking the "Run" icon atop the IDE you'll also see the awesome tools for viewing the various mobile devices currently supported as well.
After you spend a few minutes playing with the emulators and realizing how cool that all is, we'll rip out some stuff add some sauce to this and get cooking.
Reorganizing the Project for Organization
I'm a very big proponent of being able to look at a project and know what the heck is going without having to hunt down someone or run the code and step through it to find out how it's all composed.
In a C#/XAML world in I use the MVVM pattern with MVVM Light for my projects. I like to see the view folder, viewmodel folder etc. when developing the app. For doing so here I will leverage RequireJS for structuring the organization.
Removing unnecessary files
Delete the hello-world.js from the scripts folder as we will not be using this for the project.
Folder structure
First, lets create a few folders. At the root of the project create an app folder that contains view, viewmodel and model.

For any scripts that are 3rd party libraries, I prefer to put those in the scripts folder and any that are related directly to the application specific functionality I organize them within the app folder appropriately. Given that, I'll move the kendo.mobile.min.js, jquery.min.js and also add require.js to the scripts folder
Next, add a new JavaScript file to the app folder by right clicking and selecting add new file. Name is main.js; this will be the entry point to the application.
Also add a JavaScript file to the app folder named app.js, this will serve as the singelton for exposing the viewmodels and could also be referred to as the view model locator.
First item of business is to tell require.js where to find the modules we either have or will be creating in our application. Add the following to main.js to configure require.js.
require.config({
paths: {
jQuery: "../scripts/jquery.min",
kendo: "../scripts/kendo.mobile.min",
view: "../app/view",
viewmodel: "../app/viewmodel",
app: "../app"
},
shim: {
jQuery: {
exports: "jQuery"
},
kendo: {
deps: ["jQuery"],
exports: "kendo"
}
}
});
What this is doing, if you are not familiar, is telling require.js that when a module is defined like
define(['viewmodel/bp'], function(bp) { ... } );
it knows to go look for bp.js inside of the "[root]/app/viewmodel" folder and not a relative path etc. In the shim portion of the code we are stating that kendo has a dependency on jQuery and should wait for that library to load first. For more information on requirejs and the config method see http://requirejs.org/docs/api.html#config .
Finally in the main.js file add the following to create the app module, put it in scope and init the application.
var app;
require(["app/app"], function (application) {
console.log('initializing');
app = application;
app.init();
});
Last order of business is to add the code to app.js to tell kendo to initialize the mobile application. Here is the full app.js code for now.
define(["jQuery", "kendo"], function ($, kendo) {
var _kendoApplication;
return {
init: function () {
console.log('app init');
_kendoApplication = new kendo.mobile.Application(document.body,
{ transition: "slide", layout: "mobile-tabstrip" });
}
}
});
The init function is called when the application first fires up setting the transitons of the app the 'slide' and telling kendo what the layout root of the app is; in this case 'mobile-tabstrip'.
Wiring Up Index.html
Now that the scripts, view, viewmodel, entry points etc. are all setup; open index.html.
In the <head> tag remove everything except the references to the .css and cordova.js files and the we need to add the script reference to main and require.js for our entry point. After that all scripts will be loaded using AMD and require.js .
<head>
<title></title>
<meta charset="utf-8" />
<script src="cordova.js"></script>
<script data-main="app/main" src="scripts/require.js"></script>
<link href="kendo/styles/kendo.mobile.all.min.css" rel="stylesheet" />
<link href="styles/main.css" rel="stylesheet" />
</head>
Also remove the script tag at the bottom of the file that refers to the kendo.mobile.application as we have now moved that to the app.js init function.
Finally, remove all <div> tag sections with a data-role of view other that the first one. These will be separated into individual html files and stored in the views folder in Part 2 of the series. The final html document should appear as:
<!DOCTYPE html>
<html>
<head>
<title></title>
<meta charset="utf-8" />
<script src="cordova.js"></script>
<script data-main="app/main" src="scripts/require.js"></script>
<link href="kendo/styles/kendo.mobile.all.min.css" rel="stylesheet" />
<link href="styles/main.css" rel="stylesheet" />
</head>
<body>
<div data-role="view" id="tabstrip-home" data-title="Hello World!">
<h1>Welcome!</h1>
<p>
Icenium™ enables you to build cross-platform device applications regardless of your
development platform by combining the convenience of a local development toolset with the
power and flexibility of the cloud.
</p>
</div>
<div data-role="layout" data-id="mobile-tabstrip">
<header data-role="header">
<div data-role="navbar">
<span data-role="view-title"></span>
</div>
</header>
<div data-role="footer">
<div data-role="tabstrip">
<a href="#tabstrip-home" data-icon="home">Home</a>
<a href="#tabstrip-uiinteraction" data-icon="share">UI Interaction</a>
<a href="#tabstrip-geolocation" data-icon="globe">Geolocation</a>
</div>
</div>
</div>
</body>
</html>
Conclusion
If you run the application you can see that the application still operates as it did in the very beginning, with the exception of the additional views not appearing, but the advantage here is that the overall structure allows for manageability moving forward as complexity is added to the project through data services and additional views.
If there is something that you would like to see in a series or have a question please add a comment.
Code available on GitHub - https://github.com/tattoocoder/iceniumbp.git

